March 31, 2021 update: The content of this blog post is a little outdated. To learn more about current best practices for creating user opt-ins for extensions, please visit Firefox Extension Workshop. In the article “Best Practices for Collecting User Data Consents,” we talk through some considerations you will want to keep in mind and share examples of how to design and implement an opt-in flow.
Our review policies for addons.mozilla.org (AMO) require transparency when it comes to an add-on’s features and how they might affect a user’s privacy and security.
These policies are particularly relevant in cases where an add-on includes monetization features that are unrelated to its main function. For example, a video downloader add-on could include a shopping recommendation feature that injects offers from commercial websites. In cases like this, to be listed on AMO the feature would need to be opt-in. Opt-in means the add-on needs to present to the user the option to enable the feature, with a default action of keeping it disabled.
We’re often asked for examples of add-ons that do this, so I decided to create a sample WebExtension for this purpose. You can find the code on GitHub, and the built and signed example can be downloaded here.
The extension implements two opt-in prompts:
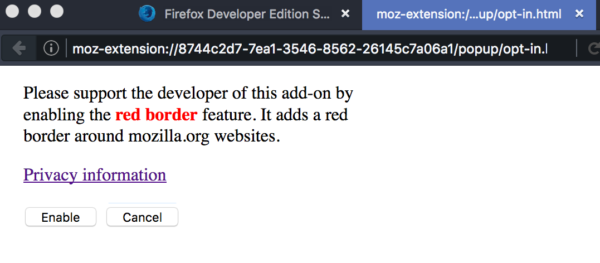
- A new tab.
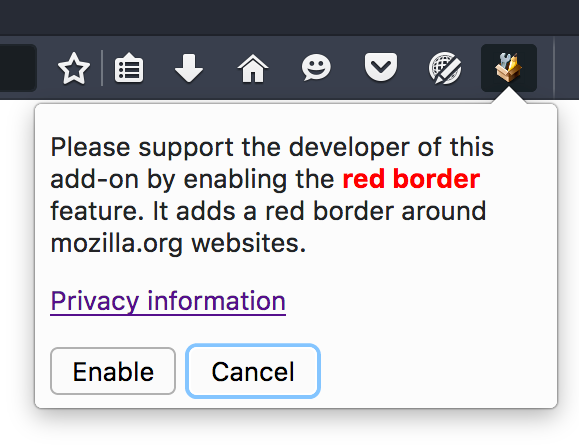
- A panel in the main add-on button.
(If you don’t recognize the dark theme in the screenshots, it’s because I’m using Firefox Developer Edition—currently Firefox 49—for testing.)
An add-on would normally implement one prompt or the other. Opening a new tab has the advantage of getting the user’s attention right away, and has more room for content. The main disadvantage is that it can annoy users and feel too pushy. The pop-up approach is more user-friendly because it appears when the user is ready to engage with the add-on and is better integrated with the add-on UI. However, it wouldn’t work if the add-on doesn’t include buttons.
This example is completely minimal, hence the almost complete lack of styling. However, it includes the elements that AMO policies deem necessary:
- Text explaining clearly to the user what the opt-in feature does and why it’s being offered. In this case, the extra feature is a variation of the borderify example on GitHub.
- A link to a privacy policy and/or more information about the feature. That page should spell out its privacy and security implications.
- A clear choice between enabling the feature and keeping it disabled, defaulting to disabled. I set
autofocus="true"to the Cancel button, which can be clearly seen in the popup screenshot.
Hitting the Return key in either case, or closing the opt-in tab should be assumed to mean that the user is choosing not to accept the feature (the tab closing case isn’t implemented in this example to make it easier to test). The example uses the storage API to keep track of two flags: one that indicates the user has clicked on either button, and one that indicates if the user has enabled the feature or not. After the opt-in is registered as shown, the tab won’t show up again, and the content changes to something else.
Note: I couldn’t find a way to look at the extension’s storage in the developer tools (I suppose it’s not implemented yet). You can clear the storage to reset the state of the extension by deleting the browser-extension-data folder in the profile.
Remember that sneaking in unwanted features is bad for your users and your add-on’s reputation, so make sure you give your users control and give them clear information to make a decision. Happy coding!
Ken Saunders wrote on